
![]()
![]()
![]()
![]()
This tutorial will cover the steps I used to finish one of my avatars that was a part of my entry to the gmax contest. There are other ways to do create UVM maps but for this project I needed to finish quickly.
This lesson requires that you have a model and a Skin Map already made.
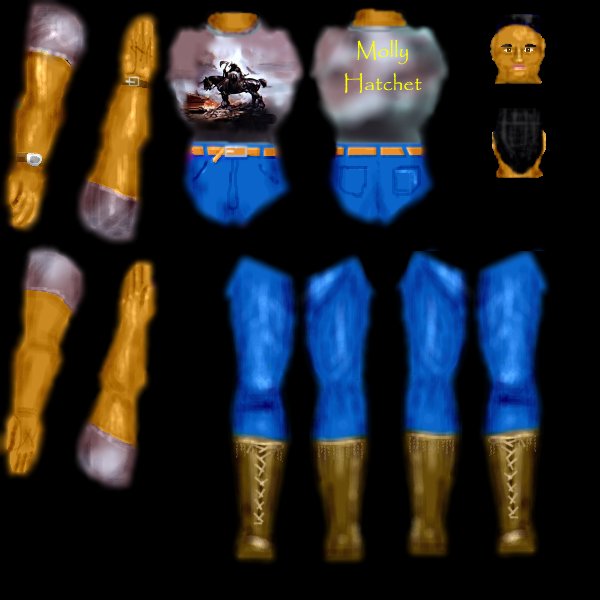 |
| This is the skin map I made to apply to my model. The first thing in making a skin is knowing what the game requirements will be. Because I am making all these models to go into Dungeon Siege I am limited on the map size as well as the polygon count of the models. If I were making this model for a game where highly detailed models I would use a lot more detail. I threw this map together in under an Hour so don't be too hard on it, this is just the first run. One of the things you will find is that it is easer to use place cards (proxy images) to create the UVM maps. Once you have assigned the map locations in relation to the skins, you can go back and tweak the skins as needed. |
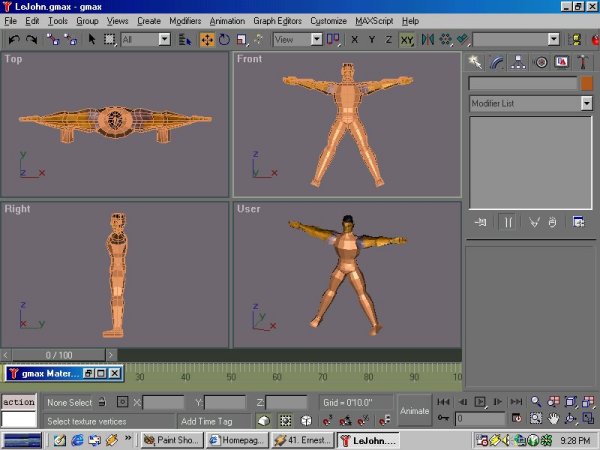 |
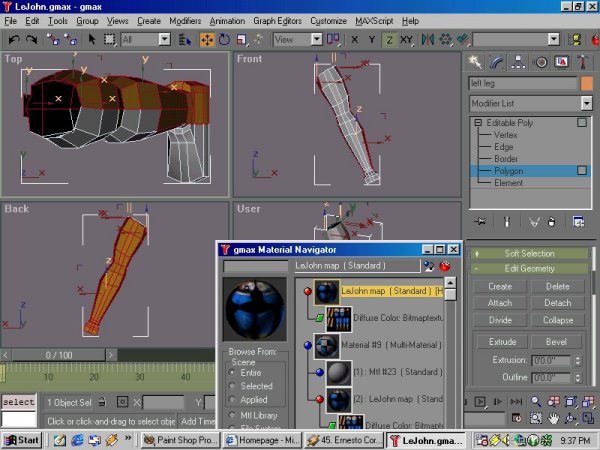
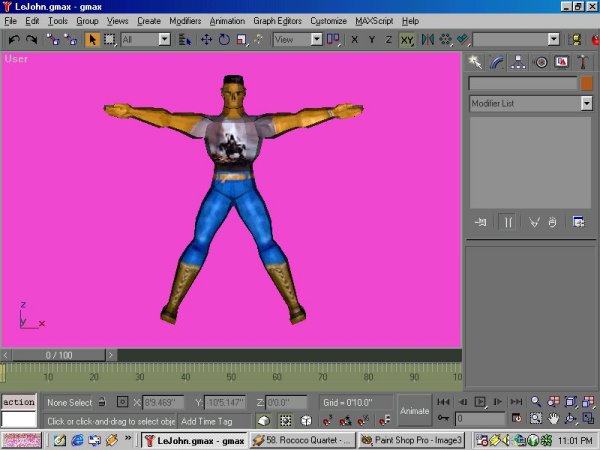
| Ok lets get started. The image above shows my avatar and as you can see I have all ready started mapping him. the first thing you need to do I isolate the areas you want too apply maps too. |
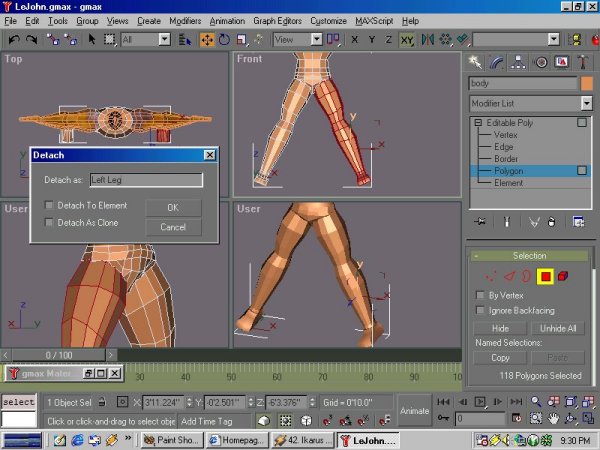 |
| 1. You do this by selecting your model then opening the modify rollout and pickling polygon. 2. Next select the area you want to apply a map too. 3. Once you have all the polygons selected then right click an pick detach from the ploy mod rollout. 4. Do not pick any of the check boxes, just name your part. In this case I am separating out the left leg. |
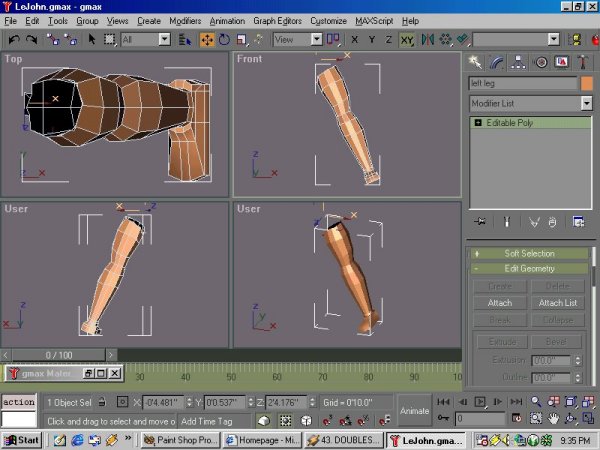 |
| Next select the part and hide all the unselected parts of your model. If you have not set your view ports to shaded and show edge you should do so now. You should also have you material browser open (not you material editor). If you have not made the skin for your model in the material editor do so now, we will be using it next. |
 |
| 1.Open the modify rollout and select polygons from it. 2. Window the area you want to apply a map too. In this case I have selected the back of the leg. 3. Simply drag the material from the browser too your selected polygons. |
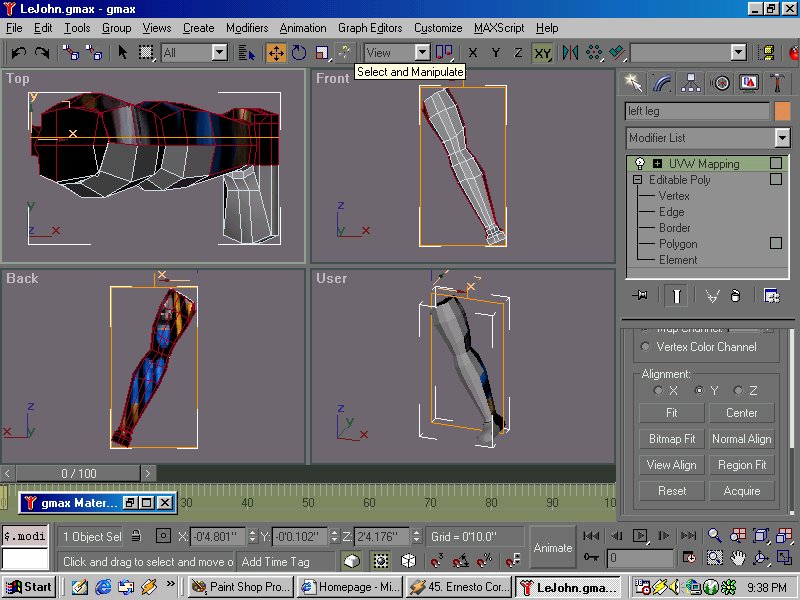 |
| Once you material is applied you have to add a UVmap. In this case I am using a plainer map. After adding the UVMap to the model I selected the "Y" aliment then picked Fit. This is so I can make sure that my skin is attached to my selected area. |
 |
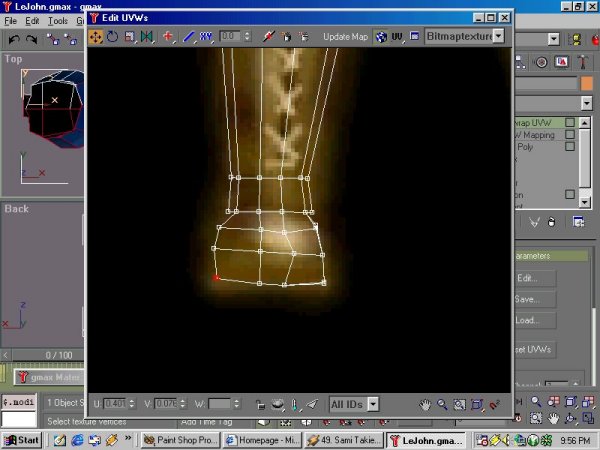
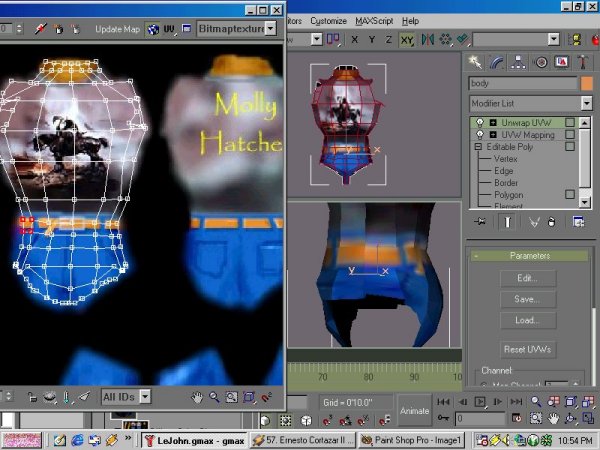
| Next add a Unwrap UVmap to the model. Pick the edit map and you will see a representation of your polygons on the material skin. Notice that it is at an angle and too large, point being that UVmapping will always take some adjustments. |
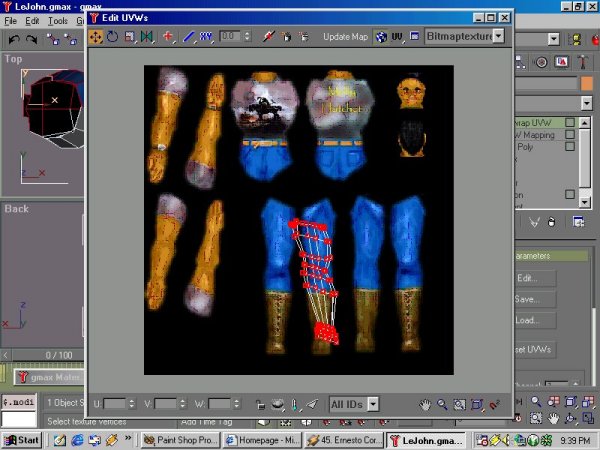 |
| To fix my map I start by scaling the UVmap down and positioning it over the left leg skin. Take your time on making all these adjustments, you can always adjust/tweak your skin but you will have to redo your UVmap if you make a major mistake. |
 |
| As you adjust your map you will see the effect on the model. Use the model as a guide when you get into a complex object. Above shows how I am adjusting the map to fit my skin. |
 |
| Take your time and make sure you adjust
you map to fit your skin. You can always add to your skin image
once the UVmap is in place. Zoom in as close as you need to see your
UVmap's edges.
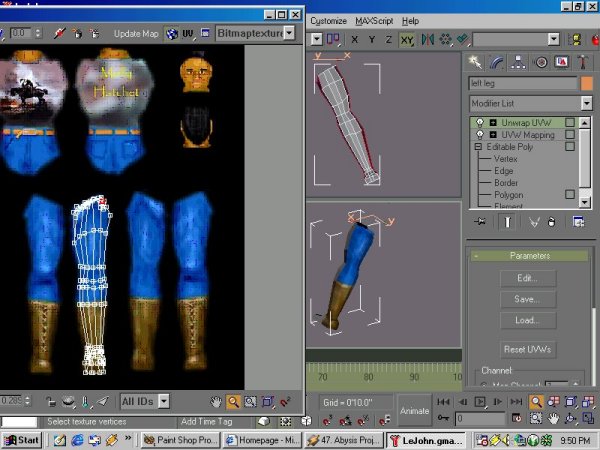
Once you have the map where you want it collapse the model by converting into an editable poly. Then repeat the process for the front of the leg. That's all there is too it. Unhide your model and select the next piece. |
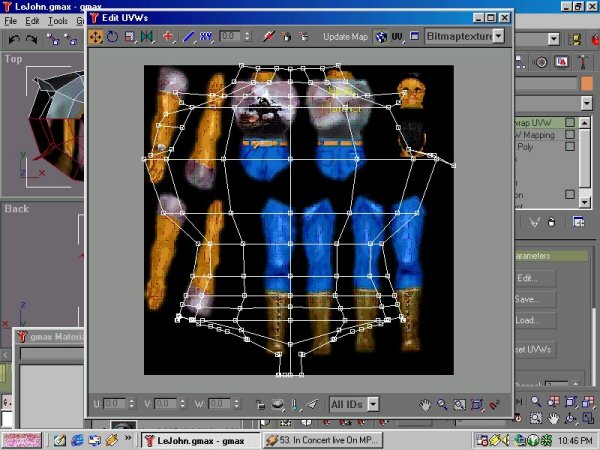 |
| Continue the process on the rest of your models pieces. |
 |
| Oh, to adjust your model so that the seams fit, nudge the vertices. Above I am nudging them to get the belt on the front and back to line up. |
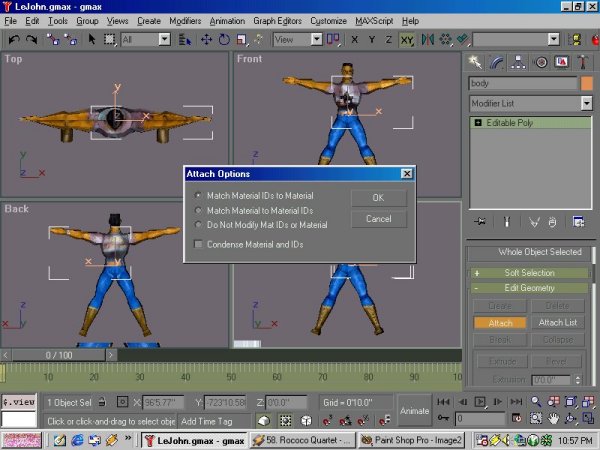 |
| Once you have all the maps assigned and
the model skinned it is time to put it back together. Pick on the biggest
piece you have and attach one of the other pieces to it. Here I
have attached the arm to the torso. When you
attach just make sure that the Match Material IDs to Material is checked.
This will keep your skins intact.
I find that if you clear the selection by not selecting anything between attaching the parts it works better (less glitchy). |
 |
| That's it,
This is a quick and dirty way to skin your model using UVMaps. Hope it helped. |